


插件的结构
详细原文可见官方文档 https://grafana.com/tutorials/build-a-data-source-plugin/#anatomy-of-a-plugin
简言之,Grafana读取我们的构建后的插件时,需要最少两个文件,plugin.json 和 module.ts。
plugin.json中描述了插件的信息,而module.js中是插件的代码,且需要在其中导出一个继承了 GrafanaPlugin类的插件对象。
本次我们编写的是数据源插件,因此需要继承 DataSourcePlugin 类。为此,我们需要实现DataSourceApi接口中的两个方法:query 和 testDatasource。
实现插件
实现query()
因为市面上的数据库种类繁多,而各个数据库之间查询方式存在或大或小的差异。这里,我们需要将数据转为Grafana规定的统一的数据结构。
Grafana在对数据进行可视化时,接受的数据类型为 MutableDataFrame ,其具有一个fields属性,类型为Field数组,其中存放了各个字段的信息与数据。
我们需要做的,便是根据Grafana查询请求,构造并返回由MutableDataFrame组成的数据。如此,我们便将需要进行可视化的数据交给了Grafana。
query方法相关类型定义
这里仅对我觉得有必要的类型进行介绍。若想更详细的了解可以看官方的类型定义文件。
query(request: DataQueryRequest<TQuery>): Promise<DataQueryResponse> | Observable<DataQueryResponse>;TQuery
用户在使用Grafana进行可视化查询时选择查询的内容,如想要查询的时间区间、字段列表。
例如,我们有一个MyQuery接口:
export interface MyQuery extends DataQuery {
  queryText?: string;
  constant: number;
}
其中反应的便是用户使用grafana查询数据时填写的内容。
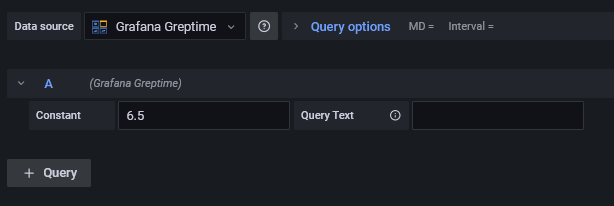
(注:这个query面板并不会根据你的自定义查询结构自动生成。需要后面自己用React写)
DataQueryResponse
我们从query方法中返回的数据类型。
interface DataQueryResponse {
    /**
     * The response data.  When streaming, this may be empty
     * or a partial result set
     */
    data: DataQueryResponseData[];
}

//………………

type DataQueryResponseData = DataFrame | DataFrameDTO | LegacyResponseData;
其中包含了之前提到的MutableDataFrame所实现的DataFrame接口。因此可以理解为我们的query方法只需要根据查询请求返回对应的 {data: MutableDataFrame[ ] } 对象就可以了。
通过http接口响应查询并构造MutableDataFrame
插件模板自带了一个MyQuery的接口,其中包含了一个可以自由填写的queryText字段。
本文编写的目标数据库Greptime支持读取sql语句进行查询。所以这里就直接将queryText字符串作为sql语句向数据库发起查询。
通过http接口获取数据的方法有很多,比如axios和js原生的fetch。然而 Grafana官方建议使用其提供的getBackendSrv方法。好处是用户对数据库请求将通过grafana后端进行代理转发,而不是直接由用户浏览器发出。一方面保证了数据安全,另一方面可以帮助缓解跨域问题。(注:并非此处一劳永逸。详见本文后半部分)
我们新建一个函数doRequest来帮助从http接口获取数据。当然,你可以把它放到其他地方然后import引入。
因为现在我们还没有实现数据源的配置文件功能,这里先硬编码进行测试。
注1:greptime的response中自带了所查数据的schema,如果你的response中不包括,你可能需要额外获取。
注2:getBackendSrv()方法会直接返回JSON parse后的body。其他的情况我没有试,如果有疑问可以看源码
import { getBackendSrv } from '@grafana/runtime';

//…………

async function doRequst(sql: String): Promise<GreptimeDBResponse> {
  const URL = 'http://greptime.mofengfeng.com';
  const SQL_URL = `${URL}/v1/sql`;

  const response: GreptimeDBResponse = await getBackendSrv().post(`${SQL_URL}?sql=${sql}`);
  return response;
}
我们接下来要做的就是将response转化为Grafana的DataFrame
Greptime的http接口response格式长这样
{
    "code": 0,
    "output": [
        {
            "records": {
                "schema": {
                    "column_schemas": [
                        {
                            "name": "host",
                            "data_type": "String"
                        },
                        {
                            "name": "idc",
                            "data_type": "String"
                        },
                        {
                            "name": "cpu_util",
                            "data_type": "Float64"
                        },
                        {
                            "name": "memory_util",
                            "data_type": "Float64"
                        },
                        {
                            "name": "disk_util",
                            "data_type": "Float64"
                        },
                        {
                            "name": "ts",
                            "data_type": "Timestamp"
                        }
                    ]
                },
                "rows": [
                    [
                        "host1",
                        "idc_a",
                        11.8,
                        10.3,
                        10.3,
                        1667446797450
                    ],
                    [
                        "host1",
                        "idc_b",
                        50,
                        66.7,
                        40.6,
                        1667446797450
                    ],
                    [
                        "host2",
                        "idc_a",
                        80.1,
                        70.3,
                        90,
                        1667446797450
                    ]
                ]
            }
        }
    ],
    "execution_time_ms": 1
}
我们再来写一个函数,将response转为DataFrame
function parseResponseToDataFrame(response: GreptimeDBResponse): MutableDataFrame {

}
从上面的数据格式中将schema和data分别提取出来
const columnSchemas = response.output[0].records.schema.column_schemas;
const dataRows = response.output[0].records.rows;
然后构造DataFrame。这里是对schema数组用map方法直接生成了各field。
首先是字段名称,直接传入即可
然后是数据类型。Grafana有自己的一套数据类型,定义为枚举结构体FieldType。我用了一个简单的Map来处理。
enum GreptimeDataTypes {
  String = 'String',
  Float64 = 'Float64',
  Timestamp = 'Timestamp',
}

const greptimeTypeToGrafana: Record<GreptimeDataTypes, FieldType> = {
  String: FieldType.string,
  Float64: FieldType.number,
  Timestamp: FieldType.time,
};
最后是values。因为字段位置与下标是相对应的,这里也直接使用map方法来处理。
const frame = new MutableDataFrame({
  fields: columnSchemas.map((columnSchema, idx) => {
    return {
      name: columnSchema.name,
      type: greptimeTypeToGrafana[columnSchema.data_type],
      values: dataRows.map((row) => row[idx]),
    };
  }),
});
最后我们的函数长得像这样。外面的数据类型定义就先省略了。。
function parseResponseToDataFrame(response: GreptimeDBResponse): MutableDataFrame {
  const columnSchemas = response.output[0].records.schema.column_schemas;
  const dataRows = response.output[0].records.rows;
  const frame = new MutableDataFrame({
    fields: columnSchemas.map((columnSchema, idx) => {
      return {
        name: columnSchema.name,
        type: greptimeTypeToGrafana[columnSchema.data_type],
        values: dataRows.map((row) => row[idx]),
      };
    }),
  });
  return frame;
}
现在回来修改我们的query方法。因为queryText是可选字段,所以要处理一下边界情况。当然,你把他改成必填字段就没问题了。
  async query(options: DataQueryRequest<MyQuery>): Promise<DataQueryResponse> {

    const promises = options.targets.map(async (target) => {
      if (!target.queryText) {
        return new MutableDataFrame();
      }
      const response = await doRequst(target.queryText!);
      return parseResponseToDataFrame(response);
    });

    return Promise.all(promises).then((data) => ({ data }));
  }
现在,让我们来打包,然后把构建好的插件丢到grafana的插件文件夹里,然后重启grafana
> npm run build
> cp
> docker restart grafana-plugin-dev
新建我们的数据源来进行测试
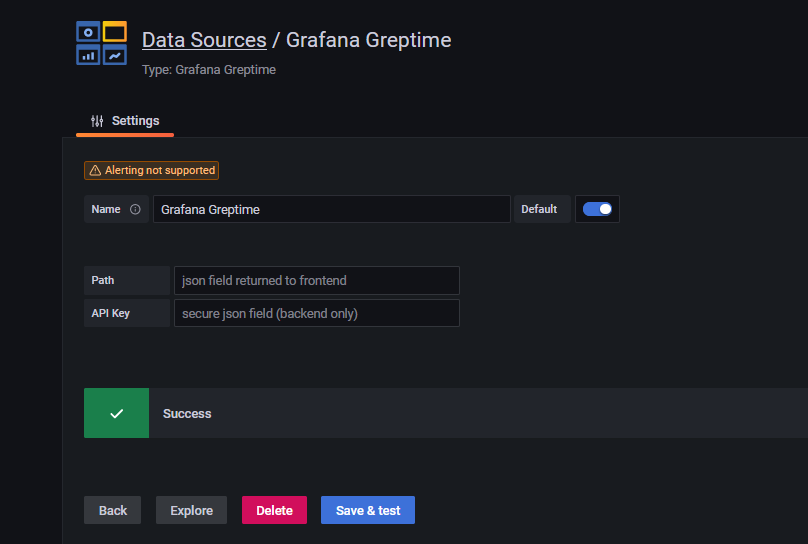
(因为我们还没有写testDatasource方法,所以默认返回成功。。)
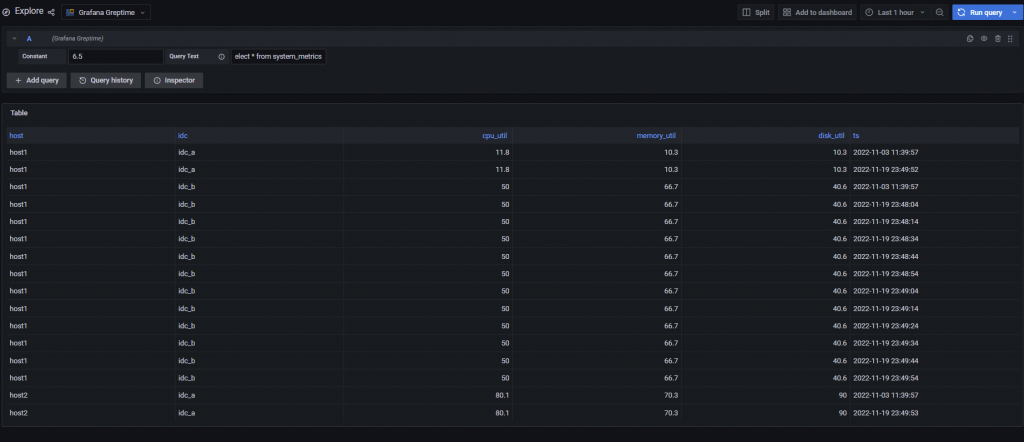
点击Explore来转到一个简单的query页面,然后输入sql,再点击右上角的query,也许你已经成功让grafana读取到数据库的数据了!
事实上。。。我最开始的时候,在这一步遭遇了跨域问题。getBackendSrv( )方法并不能直接实现代理功能,还需我们后续对插件进行配置代理地址。
如果你有对数据库服务器的使用权,可以使用nginx为你的grafana网址添加跨域许可的响应头部,笔者便是如此解决的。
实现testDatasource
跳过。
如何Debug
事实上,插件内的console.log是可以被浏览器执行出来的。我们可以借此来观察插件的运行情况。
Comments | NOTHING